Installation Directions for New Smith Titanium Inboard Rotor Hub
Installing on a brand-new axle:
- Leave pinch cap and Allen bolts in place
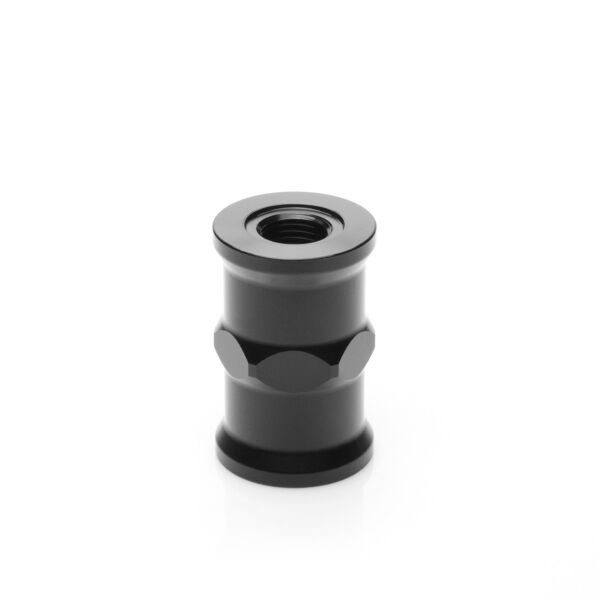
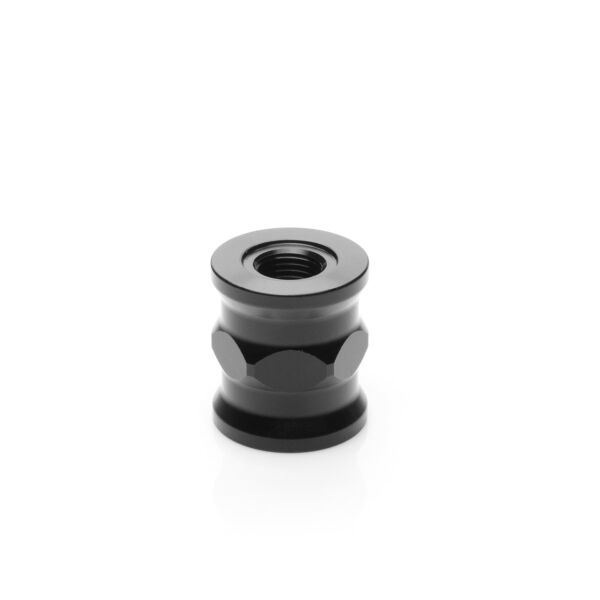
- Clamp rotor in a vice (use soft jaws or 2 pieces of aluminum sheet metal to be sure to not mark rotor) with the top of the rotor slots laying back at the top facing you. Attach the hub to the rotor with the “Smith Titanium” logo facing you on both pcs.
- Install all 8 blue T-nuts with Titanium studs then torque the 8 Silver aluminum jet nuts to 192-inch pounds using a 6-pt. socket.
- After the rotor is torqued to the hub, slide the hub on to the axle. Both logos facing you. Be sure to have it centered in the caliper. Lightly hand snug the 2 Allen bolts on the pinch cap – do not torque yet.
- With hub and rotor positioned, Now hand snug the two Silver Aluminum nuts (on the pinch cap) until they make contact. Do not torque yet. Now go back and torque the Allen bolts to 30 ft/lbs.
- Now Torque two 5/16-24 Silver aluminum jet nuts on the pinch cap to 192-inch pounds using a 6-pt socket.
- No spacer is needed. The hub should not move.
Installing on used axle:
- Remove pinch cap completely, then slide over bird cage area that has deformed splines at the steel spacer. Do not hammer the hub over deformed splines!
- Follow steps 2 – 7 above.
TORQUE (NO LUBE NECESSARY)
3/8 – 24 x 1-1/2 SHCS = 30 ft/lbs.
5/16 – 24 aluminum jet nuts = 192-inch pounds.